
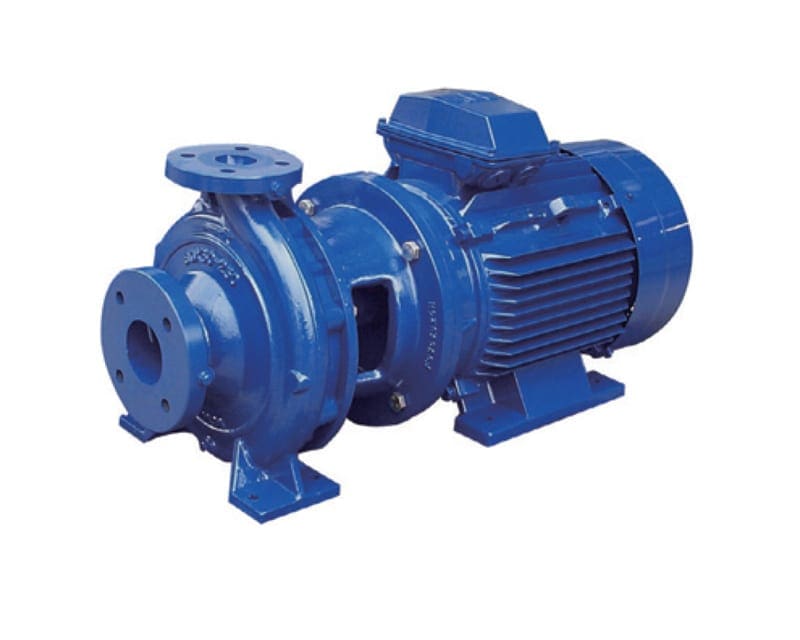
When it comes to maintaining the efficiency and longevity of your centrifugal pump, understanding how to properly install a mechanical seal is crucial. These seals are integral to preventing leaks and ensuring optimal operation.
This article will walk you through the step-by-step process of installing mechanical seals in centrifugal pumps. It also provides guidance on selecting the right type of centrifugal pump for your specific needs. If you need expert advice or high-quality pump solutions, don’t hesitate to contact us at APT Water, the centrifugal pump experts in Perth.
Materials required
Before starting, ensure you have the following:
- Replacement mechanical seal: Ensure you get the correct size and type for your pump model.
- Correct tools for the job: These will vary based on your pump model.
- Lubricant: Ensure the lubricant is compatible with the fluid your pump will be handling.
- Clean cloth: To clean the pump components.
- Safety equipment: Safety glasses and gloves to protect against accidental spills and injuries.
Step-by-step installation
Whether you’re a seasoned technician or a novice handling pumps, understanding the process of installing mechanical seals is crucial for maintaining your centrifugal pump’s performance. The following steps provide a clear, concise guide to installing these seals. Remember, safety comes first, so be sure to have all necessary protective gear at hand or simply call in the experts at APT Water to carry out this task for you.
#1 Ensure safety
Safety is paramount in every maintenance task. Before you start, ensure you are wearing your safety equipment, including gloves and safety glasses, to protect yourself from accidental spills or injuries. Make sure your working area is clean and well-lit.
#2 Isolate the electric motor.
Disconnect the electric motor from the power source and ensure it cannot be accidentally switched-on during maintenance. This is an important safety measure.
#3 Drain the pump
Mechanically isolate the pump and drain any fluid to release any pressure. The exact process can vary depending on your pump design. Some pumps feature a drain plug that allows for easy draining, while others may need to be manually pumped to remove the fluid. Ensure the fluid is disposed of properly and in accordance with environmental regulations.
#4 Disassemble the pump
Using the appropriate tools, start the process of disassembling the pump. Typically, you will start by removing the pump casing and the impeller. Be sure to consult the pump’s user manual for specific disassembly instructions because the process can vary greatly among different models.
Be gentle during disassembly to avoid damaging any components and keep track of all parts and their order of assembly. Taking pictures can help with this.
#5 Remove the old mechanical seal
Next, locate the old mechanical seal. Remove it carefully to prevent damaging the shaft or the seal chamber. If it’s difficult to remove, refer to your pump’s manual or consult a professional.
This is a great opportunity to clean the area and check the shaft and seal chamber for any signs of damage or wear. Use your clean cloth to wipe off any debris or residue. Any issues like pitting or scoring on the shaft could compromise the new seal’s performance and may require professional assistance.
#6 Prepare the new seal
Before installing the new mechanical seal, lubricate the new seal with a lubricant compatible with the fluid that the pump will be handling. This helps with the installation process and ensures the seal’s optimal function.
NOTE: Avoid touching the faces of the seal; oils from your skin can affect their function and cause premature wear.
#7 Install the new mechanical seal
The installation process of the new seal depends on the specific seal and pump model. Usually, you slide the seal onto the shaft, ensuring it’s correctly oriented. The rotating part of the seal is typically installed on the shaft, and the stationary part sits in the seal chamber or gland plate.
Ensure the seal is not installed backwards; this is a common mistake. Press the seal onto the shaft and into the seal chamber or gland plate according to the manufacturer’s recommendations. Be careful to not apply too much force or you might damage the new seal.
#8 Reassemble the pump
Once the new seal is securely in place, you can begin reassembling the pump. Start by reinstalling the impeller, ensuring it is tightened to the manufacturer’s specifications. Then, reattach the casing and secure all the bolts.
During reassembly, ensure all components are clean and free of debris. Misaligned parts can lead to inefficient pump operation or even damage. Check that all components are aligned correctly and that all fasteners are tightened properly.
#9 Refill and restart the pump
After reassembly, refill the pump with the appropriate fluid. Ensure the pump is primed properly before starting as dry running can damage the pump and the new seal. Once you have refilled and primed the pump, reconnect it to the power source and start it up, observing for any leaks. If any leaks are observed, switch off the pump immediately and recheck the seal installation.
Which type of centrifugal pump is the right choice for me?
If you’re considering installing a new centrifugal pump, choosing the right pump for your needs is crucial. This will depend on a variety of factors related to the specific application, the kind of fluid you need to pump, and the operating conditions. Here are some key factors to consider:
Pump performance
The pump performance includes flow rate, head, pressure, and efficiency. You need to match the pump’s performance with your requirements.
- Flow rate: This indicates how much fluid the pump can move in a specific time period (usually cubic metres per hour). You need to calculate the required flow rate for your application and choose a pump that can provide it.
- Head and pressure: Head is the static height that a pump can raise the fluid including any allowances for friction losses etc against gravity, usually measured in metres. Pressure is the force the pump applies to the fluid, usually measured in psi kPA or bar. Both head and pressure indicate the energy a pump can add to the fluid.
The properties of the fluid you need to pump, such as viscosity, corrosiveness, abrasiveness, temperature, and whether it contains solids, significantly influence the choice of pump.
- Viscosity: If the fluid is viscous, like oil or syrup, you may need a special type of centrifugal pump designed for viscous fluids.
- Corrosiveness and abrasiveness: If the fluid is corrosive or abrasive, you need a pump made of materials that can resist corrosion or wear.
- Solids: If the fluid contains solids, you need a pump that can handle them without clogging or damage.
Pump design
The design of a centrifugal pump dictates its application. Here, we explore four primary designs: single-stage, multi-stage, submersible, and self-priming pumps.
- Single-stage centrifugal pumps: These have one impeller and are ideal for low to medium-head and high-flow rate applications, such as water transfer, irrigation, process water and HVAC.
- Multi-stage centrifugal pumps: With multiple impellers, these pumps produce high head, making them suitable for high-pressure applications like water supply in high-rise buildings as part of a booster system or as a standalone high head duty etc.
- Submersible centrifugal pumps: Fully immersed in the fluid, these single stage pumps are great for applications with high solid concentrations, like sewage handling and well sump/pit Other submersible pumps are used for bore water applications and are of multistage construction.
- Self-priming centrifugal pumps: These pumps automatically remove air, negating the need for manual priming. They’re useful in applications where the pump is above the fluid level, such as sump pumping and waste handling.
Remember, the correct pump for your needs depends on the application, including fluid properties, flow rate, head, and operating environment. Always consult with a water pump specialist like APT Water when choosing a pump.
Operating conditions
This includes factors like the available power supply, installation space, environmental conditions (such as the risk of overheating), and whether the pump needs to run continuously or intermittently.
Total cost of ownership
Besides the initial cost, consider the cost of installation, operation, maintenance, and potential downtime. Given these considerations, it is best to consult with a qualified pump manufacturer or distributor such as APT Water to choose the most suitable centrifugal pump for your needs. We can provide expert advice based on your specific requirements and conditions.
Take a look at our water pump catalogue here.
Final Thoughts
Choosing the right centrifugal pump and maintaining it correctly, especially when it comes to tasks like installing mechanical seals, is vital for ensuring efficient and reliable operation. While this guide provides a comprehensive overview, always consult with a pump specialist when in doubt.
At APT Water, we’re here to help you with your pump selection and maintenance needs. Contact us today for expert advice tailored to your specific requirements. Remember, the best solutions are always designed with your unique needs in mind.